Some plug background
Most homes in the UK today have been cabled or re-cabled with 'ring main' or power circuits for socket outlets. The sockets used are uniform 13 amp outlets with rectangular holes to take the three flat pins of 13 amp plugs. Both plugs and sockets are manufactured to conform to British Standard BS 1363.
BS 1363 was introduced in 1947 as one of the new standards for electrical wiring in the United Kingdom for post-world war II reconstruction. The BS 1363 plug and socket replaced the BS 546 plug and socket, which can still sometimes be found in very old installations or in special applications.
A 13 amp plug is so called to denote the maximum rating of fuse that can be fitted in the plug, however this type of plug can be supplied with a 3, 5 or 13 amp cartridge fuse. A fuse must be fitted within the plug at the correct rating for the appliance connected to the plug, and the plug will not operate without a fuse being fitted.
Fitting a 13 amp plug onto a flexible cable has become more of a rare event in domestic situations, because new consumer electrical appliances sold in the United Kingdom must be fitted with a pre-wired plug in accordance with the Plugs and Sockets etc. (Safety) Regulations 1994.
Fuses
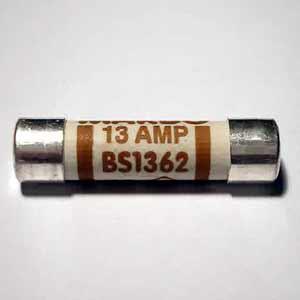
The fuse cartridge contained within the plug is made to conform to BS 1362. Always fit the fuse recommended by the equipment manufacturer; as a general guide 3 amp fuses (coloured red) are used with appliances rated up to 690 watts (for example table lamps) 5 amp fuses (coloured black) are used with appliances rated above 690 watts and up to 1150 watts and 13 amp fuses (coloured brown) are used with larger appliances rated above 1150 watts and up to 2990 watts (including kettles, irons and heaters). Some appliances (such as colour televisions, vacuum cleaners and spin dryers) although rated at less than 690 watts require a high starting current and should be fitted with 5 or 13 amp fuses. In every case please check first with the manufacturer’s instructions.
Safety Note:
If you are replacing a blown fuse, always replace it with the same rating of fuse. Failure to do so could be very hazardous.
If a replacement fuse blows, you have a cable or equipment fault.
Remove the plug from the socket and set the equipment aside before consulting a qualified repairer.
To fit a 13 amp plug
First of all, familiarise yourself with the colour code of the flex you will be connecting, as it is most important that the correct colour coded wire core goes with the correct terminal.
Using the modern colour code:- blue is Neutral, brown is Live and yellow/green stripes is Earth.
On older flex types black is Neutral, Red is live and green or yellow/green is Earth. If you come across a flex with the older colour code, treat with extreme caution as this will by now be very old, since the current colour code came into effect around 1971.
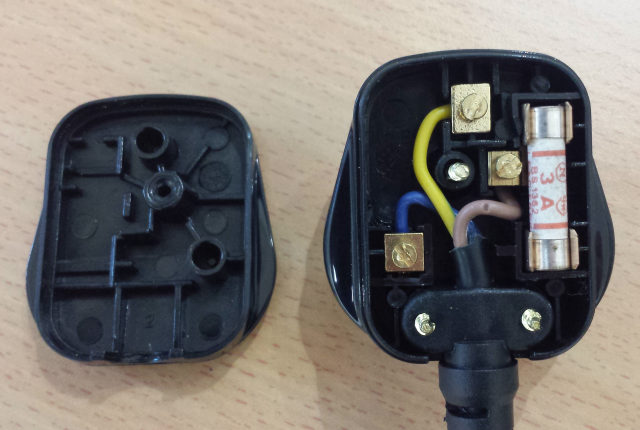
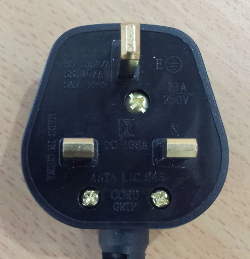
Remove the cover of the plug by undoing the large screw between the pins (shown in top picture). When you look at the plug (cover removed, showing terminals), with the longest pin (the Earth) at the top and the flex outlet at the bottom, the live terminal is on the right (marked L) and the neutral terminal is on the left (marked N). Prepare the flexible cable (flex) by carefully removing about 40mm of the outer covering of the flex, exposing the individual coloured wires but not cutting through to the copper cores and fit the flex through the flex grip. This will be either a clamp type secured with two small screws (in which case loosen the screws, thread the flex through the grip and tighten the screws) or a V-shaped grip which holds about 6mm of the flex covering inside the plug.

With the flex secured, make sure each core of the flex will reach its terminal via the route supplied in the plug, then cut 12mm beyond this for connecting to the terminals. Carefully remove about 12mm of the insulation at the end of each wire, exposing the core and twist the loose strands neatly together. Check which type of terminals the plug has. If it has screw holes as in the picture above, double back the bared wires, insert them into the terminal holes and tighten the terminal screws using a small screwdriver to secure the wires. If the terminals are of the clamp type remove the screws, wrap the wires around the terminal posts in a clockwise direction, replace the screws and tighten them. On some plugs the live terminal is underneath the fuse, in which case you will have to remove the fuse before wiring that terminal. Make sure the plug is neatly wired: the insulation on the wires must go right up to the terminals and there must not be any straggling bits of wire. Finally, double check that the wires are connected to the correct terminals before refitting the cover.
If a plug gets hot, the terminal screws may have worked loose, or it may be overloaded. Unplug and check immediately as this is a fire risk. Always replace a damaged plug immediately - never repair it, even temporarily, since there is a considerable risk of fire or electrocution. It is important to check the flexible cable regularly since the point where it joins the plug is particularly susceptible to breaking and fraying.
Earthing
When rewiring a plug make absolutely sure that the earth wire (yellow/green or green) is properly connected. If it is not, you run the risk of an electric shock should the metal casing of an appliance become accidentally live. The only appliances which do not need earthing are Double Insulated ones, which are supplied with two core flex (brown and blue cores) and mains operated shavers which are intended for use with special shaver sockets. Double Insulated appliances are identified with the double insulated mark (a square within a square) shown below.

Tools required
Ideally the tools you will need are as follows:
- Side cutters or wire stripper
- No.1 Pozidrive or Phillips screwdriver
- 3mm Flat blade screwdriver


