How to change your laptop or PC IP address
You may wish to communicate with a new device you have added to your Local Area Network in order to change it's IP address or change some other configuration features. Sometimes you need to change your PC / laptop's IP address to match the range being used by the new device temporarily. To do this via windows 10, search for Control Panel, then chose Network and Internet, click on Network and Sharing Centre, then choose 'change adapter settings' from the left hand menu.
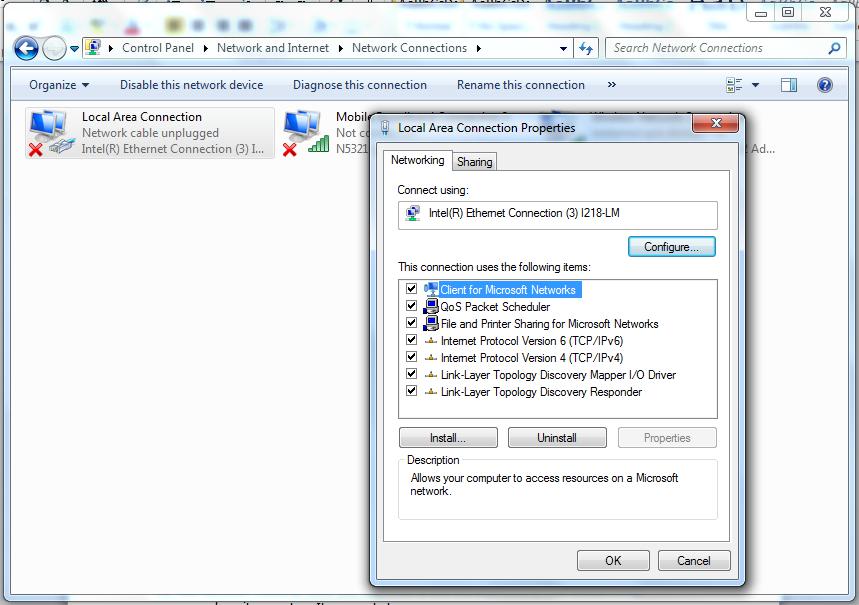
Choose the Local Area Connection and double click on it to open your Local Area Connection to view it's properties.

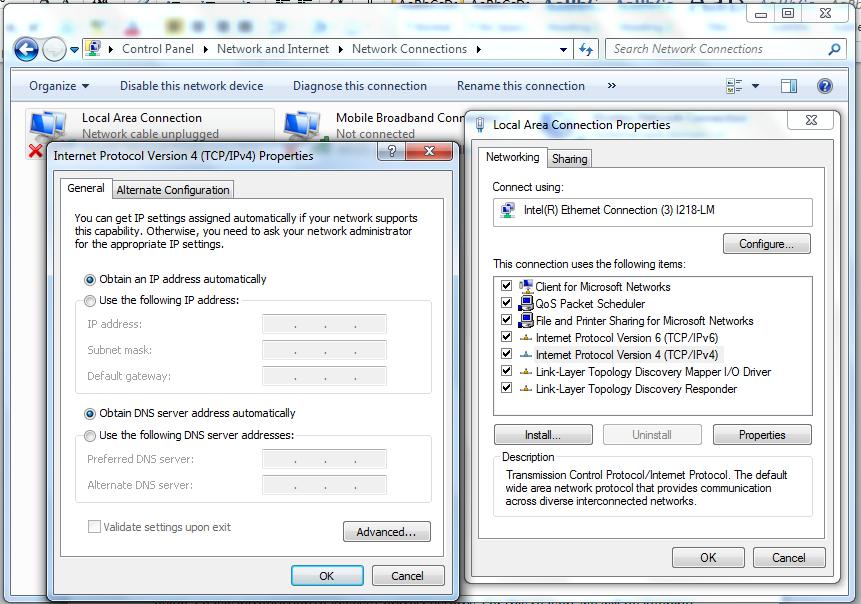
Click on Internet Protocol version 4 (TCP/IPv4) to view the IPv4 properties.

From the picture above, we can see that our network connection is configured to accept an IP address from the DHCP server (set to obtain an IP address automatically).
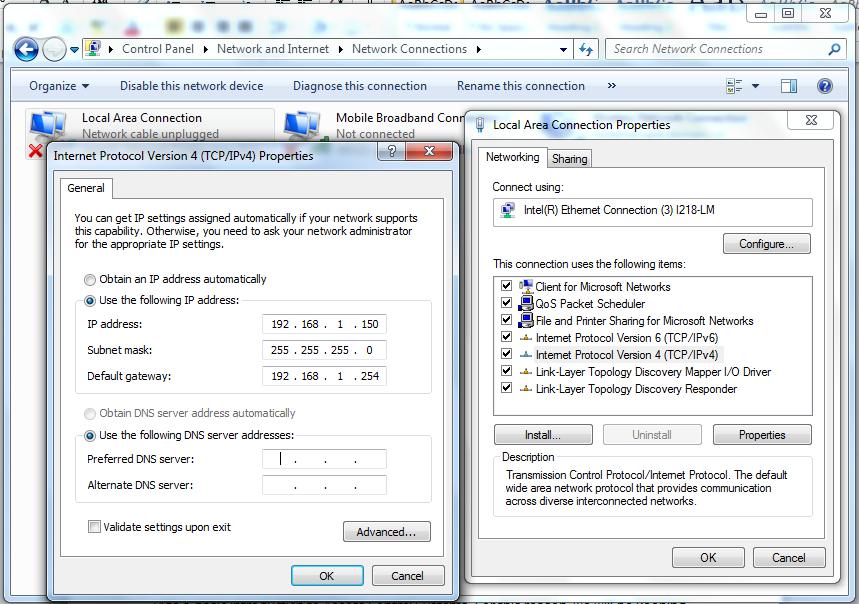
To change to a static IP address, click the ‘Use the following IP address:’ radio button and input a valid, unused IP address within your new device's IP range.

Our new device was supplied with a default IP address of 192.168.100. I have chosen 192.168.1.150 to be within the same network range (192.168.1) as the new device, but with a different node address (150 rather than 100) to the device. The subnet mask applied is what decides which numbers are part of the network range and which are for devices. The subnet mask shown above is the standard one for class C networks using this network address. On this occasion I have entered a default gateway IP address. This address is not always required, especially on closed networks, where it may be left blank.
Click OK to complete the change and test your link to the new device.
